After the arduino ide shows done uploading of the blink led program connect the led to the d4 pin of nodemcu also known as gpio 2 pin. Connect your nodemcu to your computer.
Programming Nodemcu Using Arduino Ide - Spaß für meinen eigenen Blog, bei dieser Gelegenheit werde ich Ihnen im Zusammenhang mit erklären Programming Nodemcu Using Arduino Ide. Also, wenn Sie großartige Aufnahmen machen möchten Programming Nodemcu Using Arduino Ide, Klicken Sie einfach auf das Speichersymbol, um das Foto auf Ihrem Computer zu speichern. Sie können heruntergeladen werden. Wenn Sie möchten und möchten, klicken Sie im Beitrag auf "Logo speichern". Der Download erfolgt direkt auf Ihren Heimcomputer.
Programming Nodemcu Using Arduino Ide ist eine wichtige Information, die von Fotos und HD-Bildern begleitet wird, die von allen Websites der Welt stammen. Laden Sie dieses Bild kostenlos in High Definition-Auflösung mit der unten stehenden Option "Download-Schaltfläche" herunter. Wenn Sie nicht die genaue Auflösung finden, nach der Sie suchen, wählen Sie Original oder eine höhere Auflösung. Sie können diese Seite auch einfach speichern, sodass Sie sie jederzeit anzeigen können.
Hier sind Sie auf unserer Website, Inhalt oben, veröffentlicht von Babang Tampan. Wir hoffen du liebe behalte hier. Für einige Upgrades und Aktuelle Informationen zum folgenden Foto folgen Sie uns bitte auf Twitter, Pfad, Instagram, oder Sie markieren diese Seite auf Lesezeichen Bereich, Wir versuchen zu bieten up grade regelmäßig mit frisch und neu Bilder, genieße dein Surfen und finde das Ideal für dich. Zu dieser Zeit Wir sind aufgeregt, anzukündigen dass wir entdeckt haben ein unglaublich interessanter Inhalt, der hervorgehoben werden soll, die meisten Leute versuchen zu versuchen, Einzelheiten von zu finden, und natürlich einer von diesen bist du, nicht wahr?
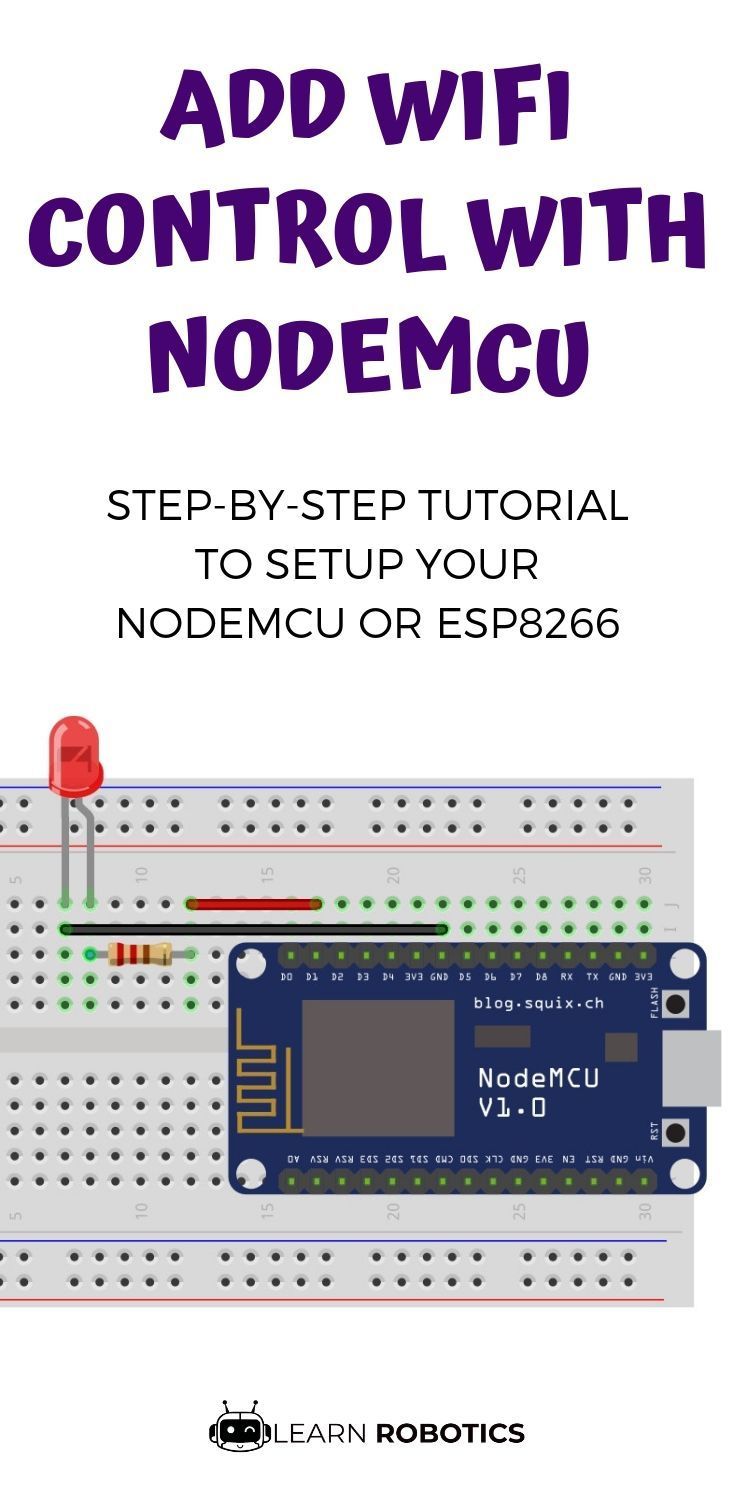
 Getting Started With Nodemcu Esp8266 Using Arduino Ide Learn Robotics Arduino Projects Diy Arduino Arduino Projects
Once you plugged it in a blue led will start flashing.

Programming nodemcu using arduino ide. The osoyoo nodemcu comes pre programmed with lua interpretter but you don t have to use it. In order to use arduino ide to program the nodemcu you have to introduce it to the software at first. Instead you can use the arduino ide which may be a great starting point for arduino lovers to familiarize themselves with the technologies surrounding the iot note that when you use the nodemcu board with the arduino ide it will write directly to the firmware erasing the nodemcu firmware so if you want to back to lua sdk use the flasher to re install the firmware.
Program nodemcu using arduino ide. To do this copy the following code and follow the steps below. You need a usb micro b cable to connect the board.
Copy the below arduino code and paste into your arduino ide and upload the program to your nodemcu or any other esp devices that you are using make sure to choose the correct port and device name from the board. Here s how to program the nodemcu using the arduino ide. If your computer is not able to detect the nodemcu board you may need to download the driver on this page.
The way to configure the arduino ide is similar between these different cards. Nodemcu feather of adafruit or arducam esp32s etc some very powerful others very specific or even very connected which you might have to use because you have a specific need or because you prefer their use. Select the proper board nodemcu 1 0.
Coding in arduino ide. Also don t forget to change the ssid and password to your wi fi settings. Now you can connect nodemcu to your computer.
When you use the nodemcu with the arduino ide it will write directly to the firmware of nodemcu erasing the original firmware so if you want back the lua sdk use the flasher to re install the firmware. Sample program for blink led is as below. Choose preferences in the file menu and enter the copied code in additional board manager urls part.
However there are other microcontrollers for example.
 Programming Esp8266 Esp 12e Nodemcu Using Arduino Ide A Tutorial Arduino Arduino Projects Electronics Projects
Getting Started With Nodemcu Using Arduino Ide Esplorer Vs Arduino Uno Led Blink By Nodemcu Youtube Arduino Get Started Ides
 Getting Started With Nodemcu Esp8266 Using Arduino Ide Learn Robotics Iot Projects Learn Robotics Arduino
 Getting Started With Nodemcu Esp8266 Using Arduino Ide Learn Robotics Arduino Arduino Projects Electronics Projects Diy
 Pin On Home Automation Internet Of Things
 Programming Esp Node Mcu Using Arduino Ide Arduino Electronics Projects Diy Arduino Projects
 Getting Started With Nodemcu Esp8266 Using Arduino Ide Learn Robotics Arduino Projects Diy Learn Robotics Iot Projects
 Getting Started With Nodemcu Esp8266 Using Arduino Ide Learn Robotics Learn Robotics Arduino Cool Arduino Projects
 Getting Started With Nodemcu Esp8266 Using Arduino Ide Learn Robotics Arduino Cool Arduino Projects Arduino Projects
 This Post Show How To Program Nodemcu Esp8266 On Arduino Ide With Esp8266 Core For Arduino Electronics Projects Diy Hobby Electronics Store Hobby Supplies
 Getting Started With Nodemcu Esp8266 Using Arduino Ide Learn Robotics Cool Arduino Projects Arduino Wifi Robotics Projects
 Programming Nodemcu Esp8266 Over The Air Ota Using Arduino Ide Arduino Ota Microcontrollers
 Programming Esp8266 Esp 12e Nodemcu Using Arduino Ide A Tutorial Arduino Wifi Arduino Gps Arduino
 Getting Started With Nodemcu Esp8266 Using Arduino Ide Learn Robotics In 2020 Learn Robotics Arduino Led Arduino
